The foundational decision facing any combatant immediately following the tutorial sequence—and the mandatory, albeit scripted, defeat at the hands of the tutorial boss Gelum—is the selection of a primary race.8 This choice establishes the absolute ceiling of the character's potential, dictates the trajectory of the progression curve for the entirety of the playthrough, and assigns the initial geographic spawn point within the game world.1 The current tripartite division—Quincy, Shinigami, and Hollow/Arrancar—presents radically distinct learning curves, mechanical requirements, and eventual power peaks.
2.1 The Quincy Paradigm: Ranged Supremacy and Linear Progression
The Quincy faction currently dominates the foundational tier lists, operating as the premier recommendation for players prioritizing rapid, frictionless progression into the endgame.1 The fundamental advantage of the Quincy pathway lies in its highly forgiving power curve, heavily fortified baseline statistics, and immediate access to dominant ranged engagement tools that trivialize early-game melee encounters.1 Within the Quincy architecture, the clan system dictates baseline statistical multipliers that dramatically alter build viability.1 Because clan assignments are stochastic and randomized at character creation, understanding the mathematical weight of these lineages is paramount for determining whether to invest in a character or utilize clan reroll tokens immediately. The clan tier list is rigidly stratified based on the universal applicability of the provided buffs in high-level engagements.
| Quincy Clan | Tier Placement | Primary Statistical Buffs | Strategic Application and Meta Relevance |
|---|---|---|---|
| Kurosaki | S | Reiatsu, Weapon Damage, Shunpo Speed | The mathematically optimal choice for generalized hybrid builds. The amplification of Shunpo speed directly synergizes with the faction's ranged zoning requirements, allowing unparalleled kiting capabilities.1 |
| Haschwalth | A | +2.5% Kido Damage, Defense, Ranged Pressure | The definitive choice for caster-focused configurations, sacrificing raw physical output for maximum ability burst and geometric area-denial.1 |
| Eisenhauer | A | Defense, Kido Damage, Ranged Pressure | A secondary alternative for ability-centric engagements, highly viable for players prioritizing attrition warfare and sustained zoning over raw burst damage.1 |
| Ishida | A | Defense, Kido Damage, Ranged Pressure | Functionally identical to Eisenhauer in current meta applications, providing reliable survivability for ranged specialists.1 |
| Parnkgjas | B | General Defensive and Weapon Bonuses | Acceptable baseline clans, though mathematically inferior to Kurosaki in peak damage per second (DPS).1 |
| Richter | B | General Defensive and Weapon Bonuses | Provides adequate sustain for newer players learning parry timings, but lacks offensive scaling.1 |
| Kraus | B | General Defensive and Weapon Bonuses | A middle-ground clan that neither excels nor strictly penalizes the player.1 |
| Wernarr | B | General Defensive and Weapon Bonuses | Offers marginal weapon damage buffs that are quickly outpaced by mid-game equipment.1 |
| Schulte | C | Equipment Load Only | An entirely negligible benefit in the current highly mobile meta. Players rolling Schulte are universally advised to reroll immediately.1 |
The Kurosaki clan's S-tier status is derived from the compounding utility of its traits.1 Because the Quincy playstyle necessitates maintaining spatial advantage over melee-oriented adversaries, the enhancement to Shunpo Speed operates simultaneously as an offensive positioning tool for lining up linear attacks and a defensive disengagement mechanism to avoid guard-breaks.1 Furthermore, the base Reiatsu amplification guarantees that Kurosaki players can sustain extended barrages without succumbing to resource depletion. Progression as a Quincy demands dedicated grinding through narrative parameters to bypass initial limitations.11 A critical milestone in this trajectory is reaching Level 25, which acts as a hard mechanical gate for advanced class abilities.13 The evolutionary path strictly requires the crafting, equipping, and eventual mastery of the Sanrei Glove.13 The Sanrei Glove functions as a temporary power-limiting device; however, operating under its severe constraints serves as the mandatory mechanical bridge to unlocking Letzt Stil.13 Once the mathematical constraints of the Sanrei Glove are overcome through sustained combat experience, practitioners achieve Letzt Stil, the penultimate state of Quincy power.13 Maintaining this state ultimately culminates in the unlocking of the Schrift—a randomized elemental or conceptual power that entirely redefines the combat loop and alters the fundamental hitboxes of the player's attacks.15 Current meta-dominant Schrifts heavily favor area-of-effect denial and localized burst damage, enabling Quincy players to implement the highly regarded "Blood Tax" build, which prioritizes overwhelming ranged pressure to bleed opponent resources before closing in for weapon executions.1
2.2 The Shinigami Conundrum: High Skill Ceilings and Incomplete Kits
The Shinigami, or Soul Reaper, pathway currently ranks as the most demanding, mechanically intensive, and least forgiving of the three primary factions.1 Statistically, Soul Reapers launch with the lowest baseline health pool of any race, creating an incredibly steep early-game learning curve where even standard environmental enemy encounters pose lethal threats to novice players.10 Furthermore, as an overarching factional penalty, the Shinigami kit is fundamentally incomplete in the current build of the game; while Quincies possess Letzt Stil and Arrancars command Resurrección, Shinigami players are currently denied access to their canonical ultimate form, Bankai, limiting their absolute late-game power ceiling.1 Despite these apparent handicaps, dedicated players favor the Shinigami for its extreme agility and the profound depth of its melee combinations.18 The viability of a Soul Reaper is heavily contingent upon their randomized clan assignment, which offers a distinctly different set of parameters compared to the Quincy lineages.
| Shinigami Clan | Tier Placement | Primary Statistical Buffs | Strategic Application and Meta Relevance |
|---|---|---|---|
| Shihoin | S | Shunpo Stamina | Unparalleled mobility. Allows the player to chain flash steps indefinitely, creating an engagement envelope that is impossible for slower opponents to track.1 |
| Kamamura | A | Shunpo Speed | Enhances the velocity of the flash step rather than the capacity, making individual dodges highly unpredictable.1 |
| Kuchiki | A | Lightning Damage | Provides a highly specialized elemental damage multiplier, creating devastating synergies with specific Shikai manifestations.1 |
| Yamamoto | B | Hakuda Damage | Optimal for hand-to-hand combat specialists who prefer to bypass weapon strikes in favor of rapid, posture-breaking martial arts.1 |
| Hitsugaya | B | Melee Defense | A purely defensive lineage that helps mitigate the Shinigami's inherently low baseline health pool during early progression.1 |
| Abarai | B | Kido Damage | Enhances the output of spells, but is generally considered inferior to Quincy casting due to lower baseline Reiatsu efficiency.1 |
| Madarame | C | Weapon Damage | A flat physical modifier that scales poorly into the late game compared to mobility or elemental enhancements.1 |
The Shinigami progression path is heavily reliant on the acquisition and refinement of the Shikai, the initial release state of their zanpakuto. Achieving Shikai is a multi-tiered process that introduces the player to the Inner World mechanics.9 Upon reaching the necessary progression milestones, players must project their consciousness into their Inner World, wherein they must first defeat a specialized NPC representation of their weapon, followed immediately by a grueling Shikai Boss fight.9 Defeating this manifestation secures the Shikai ability, granting access to a randomized elemental affinity that fundamentally alters their combat animations.9 Because the weapon assignment is highly randomized, players frequently acquire armaments featuring sub-optimal frame data or disjointed hitboxes that clash with their selected Shikai element.21 To rectify this, the game introduces a highly granular Meditation mechanic, unlocked strictly at Level 25.21 The Meditation ritual provides a deterministic mechanism to purge unwanted armaments from the character's theoretical loot pool. The sequence requires precise execution under duress. First, the player initiates the Aura Phase by meditating until a distinct visual aura envelopes the avatar for approximately 0.5 seconds.21 Once the aura is confirmed, the player must immediately break the meditation state and enter the Combat Phase by engaging in live combat.21 During this physical engagement, the environmental lighting will shift dramatically, and a prompt reading "Find me" will manifest above the player's health GUI, indicating a successful trigger.21 This exacting sequence of aura-meditation followed by a combat-trigger must be repeated flawlessly 3 to 5 times.21 Upon successful completion, a final meditation session summons the manifestation of the player's Shikai dialogue interface, offering a menu from which the player permanently strikes an unwanted weapon variant from their potential acquisition pool.21 Subsequent progression milestones, specifically between Levels 28 and 29, introduce secondary meditation states.21 These sequences are currently understood to be primarily visual, characterized by an intensely blinding white screen, operating narratively to artificially close the "spiritual distance" between the avatar and their weapon spirit.21 Mastering these mechanics is absolutely essential for acquiring optimal, top-tier Shikai forms such as the highly coveted Senbonzakura and the exceptionally rare Ink variant, both of which offer dominant midrange control that compensates for the missing Bankai.9
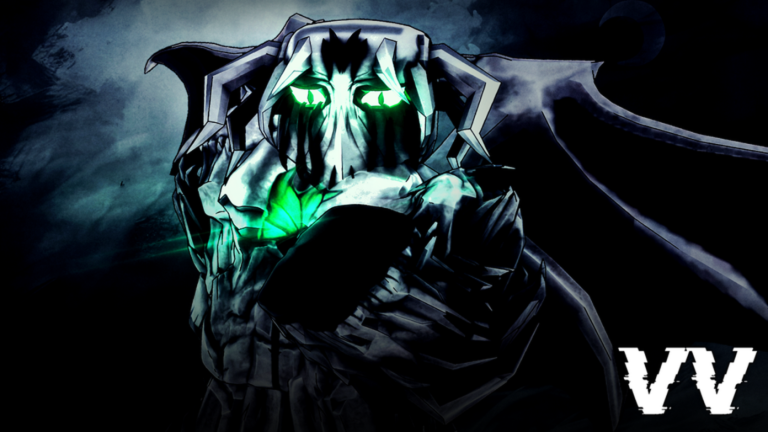
2.3 The Arrancar Metamorphosis: Delayed Gratification and the Trait Economy
In stark contrast to the Quincy's immediate efficacy and the Shinigami's high-mobility finesse, the Hollow pathway is a grueling test of endurance, isolation, and biological assimilation. It offers the game's slowest early progression but yields arguably the most flexible, durable, and potent absolute peak.1 The Hollow lifecycle is a strictly linear evolutionary chain dictated by the consumption of biomass, and the overarching strategy requires absolute adherence to late-stage transformation protocols.5 The progression demands that players evolve through a strict biological hierarchy: Fishbone → Menos Grande → Adjuchas → Vasto Lorde → Arrancar.23 The initial state is the Fishbone Phase.23 Advancing to the next tier requires reaching Level 7.23 During this phase, players must select a Hollow archetype (Gorilla, Lizard, Centipede, or Turtle). The Gorilla archetype is mathematically and mechanically superior, offering balanced velocity and durability.5 Selecting the Gorilla significantly mitigates the difficulty of the eventual Resurrección boss fight, which is notoriously challenging for the slower, more cumbersome archetypes.5 Upon achieving Level 7, the player mutates into the Menos Grande Phase, characterized by a massive increase in physical size and the unlocking of the base Cero beam.23 To progress to Adjuchas, combatants must locate and initiate the Primal Urges pt. 1 questline, demanding the execution of 8 rival Hollow entities and the physical destruction of 60 environmental objects.23 Players optimize this objective by specifically targeting large clusters of standard trees while actively avoiding indestructible assets like bamboo stalks and village infrastructure, which do not increment the quest counter.23 Following completion, the player condenses into the Adjuchas Phase, regaining mobility.23 Progression to the Vasto Lorde apex requires the completion of Primal Urges pt. 2, a sheer volumetric grind necessitating the slaughter of 70 Hollows across the Hueco Mundo and Human World biomes.23 The optimal routing for this phase involves prioritizing high-value targets; for instance, hunting the Giant Dragonfly yields an accelerated progression modifier of +5 points per kill, drastically reducing the total time spent in this highly vulnerable state.23 The most critical mechanic in the entire Hollow ecosystem is the mask-ripping protocol. Throughout the Menos and Adjuchas phases, the game interface provides the mechanical option to manually tear off the Hollow mask (bound to the 'L' key on standard keyboard configurations).23 This is universally recognized as the most catastrophic "noob trap" in the game's architecture.23 Premature mask removal forces an immediate, irreversible transition to the Arrancar state.23 Doing so permanently locks the character out of the Vasto Lorde evolution and, crucially, caps their maximum anatomical Hollow Trait capacity at three slots instead of the optimal four.23 Elite players mandate delaying the mask-ripping process until the Vasto Lorde phase is achieved and all four trait slots are populated with mathematically synergistic attributes.23 Furthermore, Arrancars generated from premature mask removal are actively penalized by being denied immediate access to their Resurrección weapon, forcing them to grind barehanded and highly disadvantaged until Level 25.24 Hollow Traits represent a randomized array of genetic modifications acquired by cannibalizing the remains of fallen entities.25 These traits persist into the final Arrancar phase but become strictly conditional: they only activate and apply their statistical modifiers while the player is actively channeled into their True Resurrección form.25 Consequently, constructing a trait loadout requires meticulous planning for the character's final endgame state and elemental affinity.
| Hollow Trait | Buff Parameters | Debuff Parameters | Synergistic Application and Meta Strategy |
|---|---|---|---|
| Wings | +3% Movement Speed, +5 Shunpo Stamina, +3 Shunpo Speed | None | A universal mobility enhancer with no drawbacks. Optimal for spacing and tracking highly mobile Shinigami.25 |
| Skinny | +7.5% Movement Speed | -1.2% Melee Defense | High-risk mobility. Pairs perfectly with ranged Cero artillery builds that intend to never enter melee range.25 |
| Dense Muscles | +1% Weapon/Hakuda Damage, +45s Resurrección Duration | None | S-Tier for melee bruisers. The massive 45-second duration extension fundamentally shifts the math of attrition battles, allowing Arrancars to outlast opposing Letzt Stil or Shikai forms.25 |
| Energized | +2% Kido Damage, Weapon scales slightly from Kido stat | None | Niche application for specialized hybrid casters utilizing Kido-adjacent Resurrección abilities.25 |
| Tentacles | 18% Chance to inflict Poison damage on melee attacks | -1% Weapon Damage | Excellent for Hakuda rushdown builds prioritizing damage-over-time pressure and bypassing standard blocking.25 |
| Innocuous Presence | Hides Name & Reiatsu Signature, +5% Movement Speed, +20s Resurrección Duration | None | S-Tier for PvP roaming, invasions, and ambushes. The obfuscation of the Reiatsu signature creates immense tactical advantage in the open world, preventing tracking.25 |
| Back Scales | Cero charges 12% faster, +20s Resurrección Duration | -5% Cero Damage | The fundamental building block for rapid-fire beam-focused builds, offering excellent uptime.25 |
| Tailbone | +20% Cero Damage | Cero becomes 25% thinner | The ultimate Cero amplification. The width debuff necessitates significantly higher aiming proficiency, but a successful hit melts opposing health bars.25 |
| Giant | +5% Melee Defense, +2% Kido Defense | -5% Movement Speed | Strictly for defensive tanking. Highly detrimental in a meta that heavily favors agility and positioning.25 |
| Exoskeleton | +2% Melee Defense, +5% Posture, +15% bigger healthpack for Resurrección | -2% Movement Speed | A vastly superior alternative to Giant. The posture enhancement prevents catastrophic guard-breaks during extended melee exchanges.25 |
| Horns | +35% Cero Width, +10% Cero Length | None | Actively counters the Tailbone debuff, creating massive area-denial capabilities and making dodges nearly impossible.25 |
| Deadly Claws | +3% Hakuda Damage, +0.1 Armor Penetration (AP) | Blunt base attacks become sharp | Vital for hand-to-hand specialists looking to maximize Armor Penetration stacking and bleed effects.25 |
| Iron Skin | Standard Defense and Posture Regeneration | None | Widely recognized as the safest pick for all generalized builds, providing posture regeneration that actually matters in drawn-out fights.26 |
A theoretically perfect Cero-artillery configuration requires the combination of Tailbone, Back Scales, and Horns. This trinity ensures an ultra-fast charging, massively damaging, and structurally wide beam that brutally punishes lateral movement and overrides standard defensive cooldowns.25 Conversely, a melee-dominating Arrancar should pursue Dense Muscles, Iron Skin, Exoskeleton, and Deadly Claws, creating an unbreakable juggernaut capable of absorbing extreme punishment while shredding opponent posture.26